
Why do a custom installation?
The documentation for installing LaTeX states that on macOS, it is recommended to use Mactex. This is tailored for macOS, including some support for native mac apps, as well as having a native mac installation. However, it is a very large download file, currently 3.9GB and the installation takes almost 7GB on your system. The entry level Macbook Pro comes with a 256GB hard drive, so 7GB is not a massive amount of space, but it’s still around 3% of your hard drive taken up. On older models, the basic version was even less: in 2014 I got a Macbook Pro 13” Retina wioth 128GB hard drive, and the Macbook Air used to be the same, and then the full Mactex installation takes up 6% of your system. This may not be an issue for you, but given that Mactex installs (pretty much) the complete TeX installation, most likely you’re not going to use most of what is installed, so it’s just wasted space.
If you then find space at a premium, you just dislike wasted space, or you want to control absolutely everything that goes on your system, then there is also the option to install over the internet, which gives you more control over the installation, letting you tailor it to your own needs. I’ll show how to do this in this guide. Note that various steps below require you to input terminal commands. If you’re not familiar with doing this, then you need the ‘Terminal’ app that is preinstalled on your Mac, or some other shell emulator like iTerm2.
Preparing the installation
Go to the TeX Live availability page from the TeX Users Group and click install-tl-unx.tar.gz or http://mirror.ctan.org/systems/texlive/tlnet/install-tl.zip.
This will download a tarball or zipfile that contains the necessary script for the installation.1
Then, open a terminal window and type the following to navigate to your Downloads folder:
cd ~/Downloads/
Once there, extract the contents of the file you downloaded, selecting the first option if you downloaded the tar.gz file (recommended) or the second if you downloaded the .zip file:
tar -xvf install-tl-unx.tar.gz
unzip install-tl.zip
Then navigate into the directory that was extracted.
In the following, the filename includes the date of download and so replace YYYMMMDD with the relevant information: use ls | grep install-tl to find out the relevant number sequence for you:
cd install-tl-YYYYMMDD
Now you’re in a position to run the install script. There are two ways to install, with the same result: either with a GUI or continuing with the command line, and both are outlined in the sections below.
Note: I will outline how to install as the non-root user, as being root is not necessary. There are circumstances where installing as root is preferable, in which case see below, but there is an inherent risk (albeit small in this case) with installing as root, given that the root user has complete access to the system. Thus, if the installation is corrupt then you are potentially putting your system at risk. It’s always good advice in these situations to not run something as root if you don’t need to.
Before continuing, using either ‘Finder’ or the following command, make a directory in which you will install Texlive:
mkdir -p ~/bin/
Install without GUI
Firstly, if you are happy continuing to use the command line, enter the following command to begin the installation:
perl install-tl -no-gui
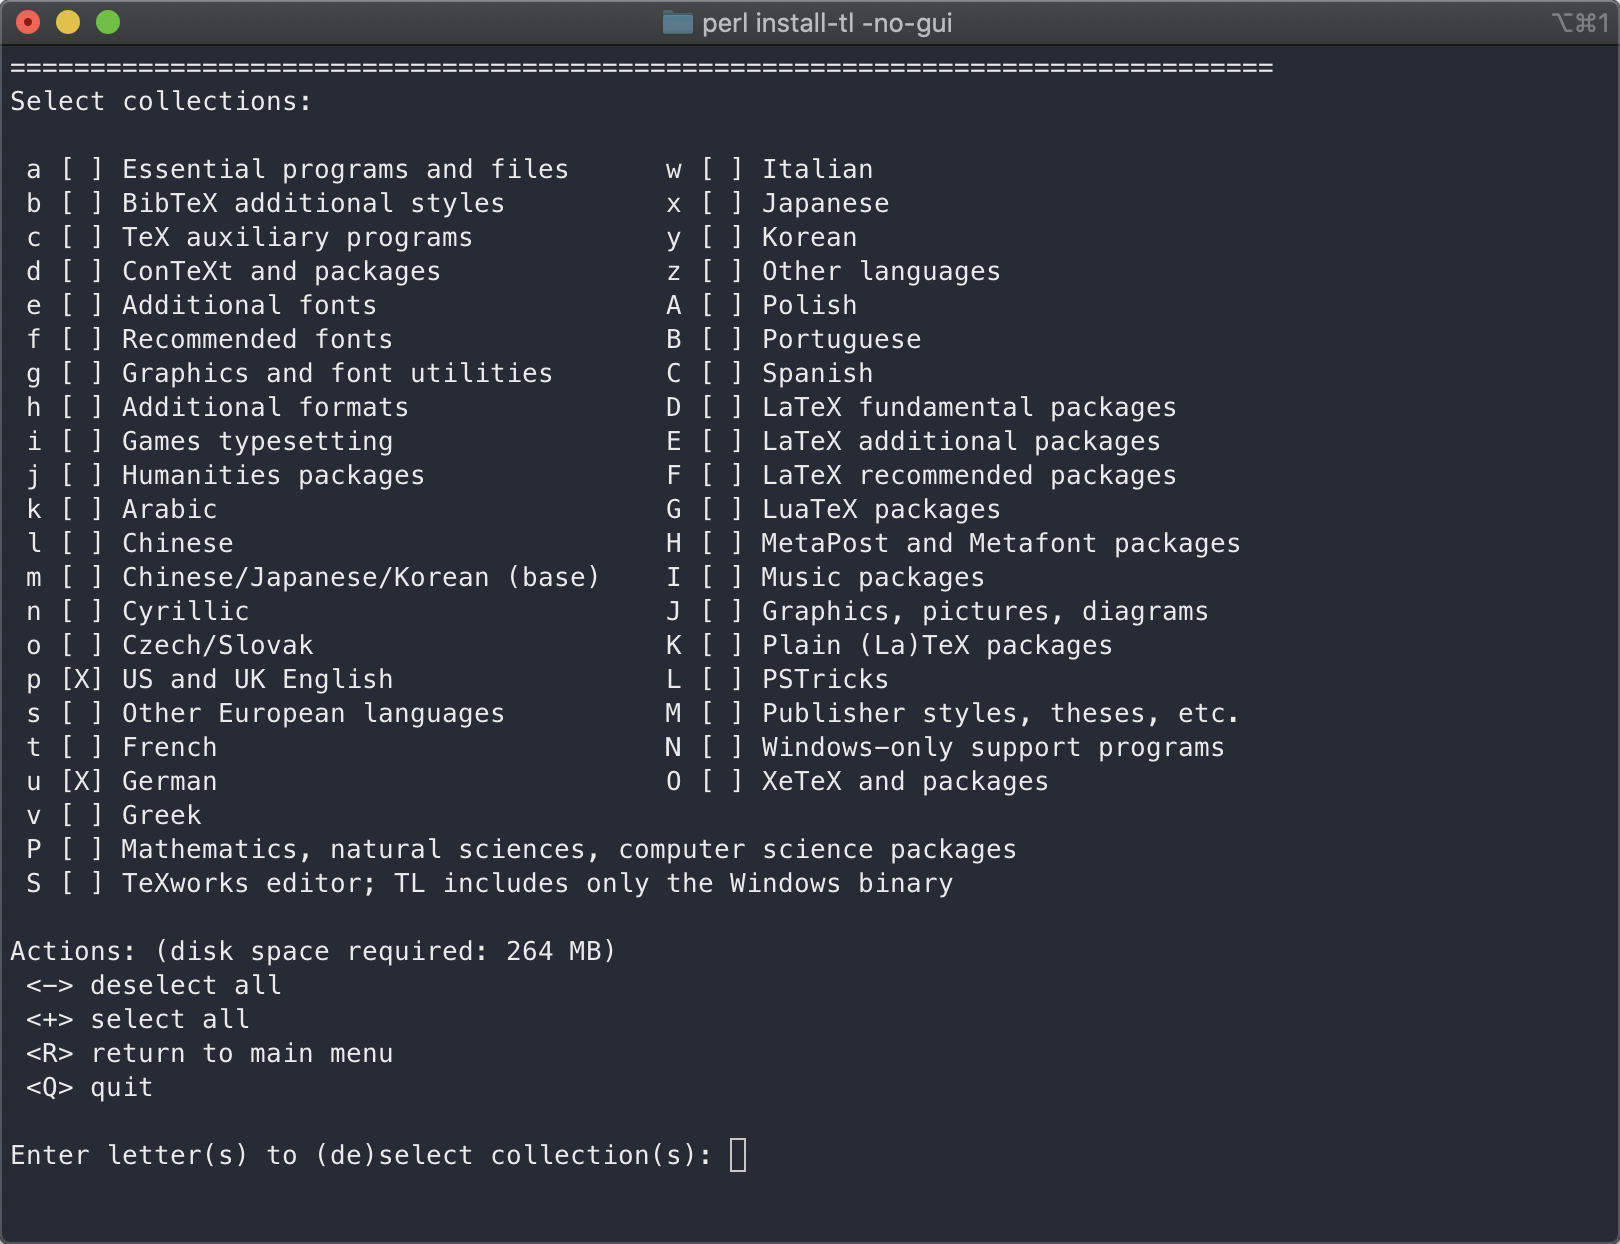
Putting in this command will bring up the following dialogue:

You have the option to determine a number of options here:
- B = set platform. Most likely you don’t need to touch this, the installer will figure it out by default.
- S = choose installation scheme, where you have a set of predefined installation options, from the full installation to small among others.
- C = set installation collections. Effectively the list of packages and programs that you’ll install. The default is 40 for the full installation. We’ll modify this below.
- D = Set installation location. We’ll also change this.
- O = further options. We’ll leave these as they are, but the options can already be seen.
- I = begins the installation
- V = sets up for portable versus regular installation.
- P = saves a profile if you want to repeat the installation with the same options somewhere else.
- H = help
- Q = quit
Setting the installation path
First, we need to change the installation location.
The default is to install texlive in /usr/local/texlive/2020. This however is a restricted directory and so can only be written to with superuser privileges.
Press D and then Enter and the following with a number of variables is shown:
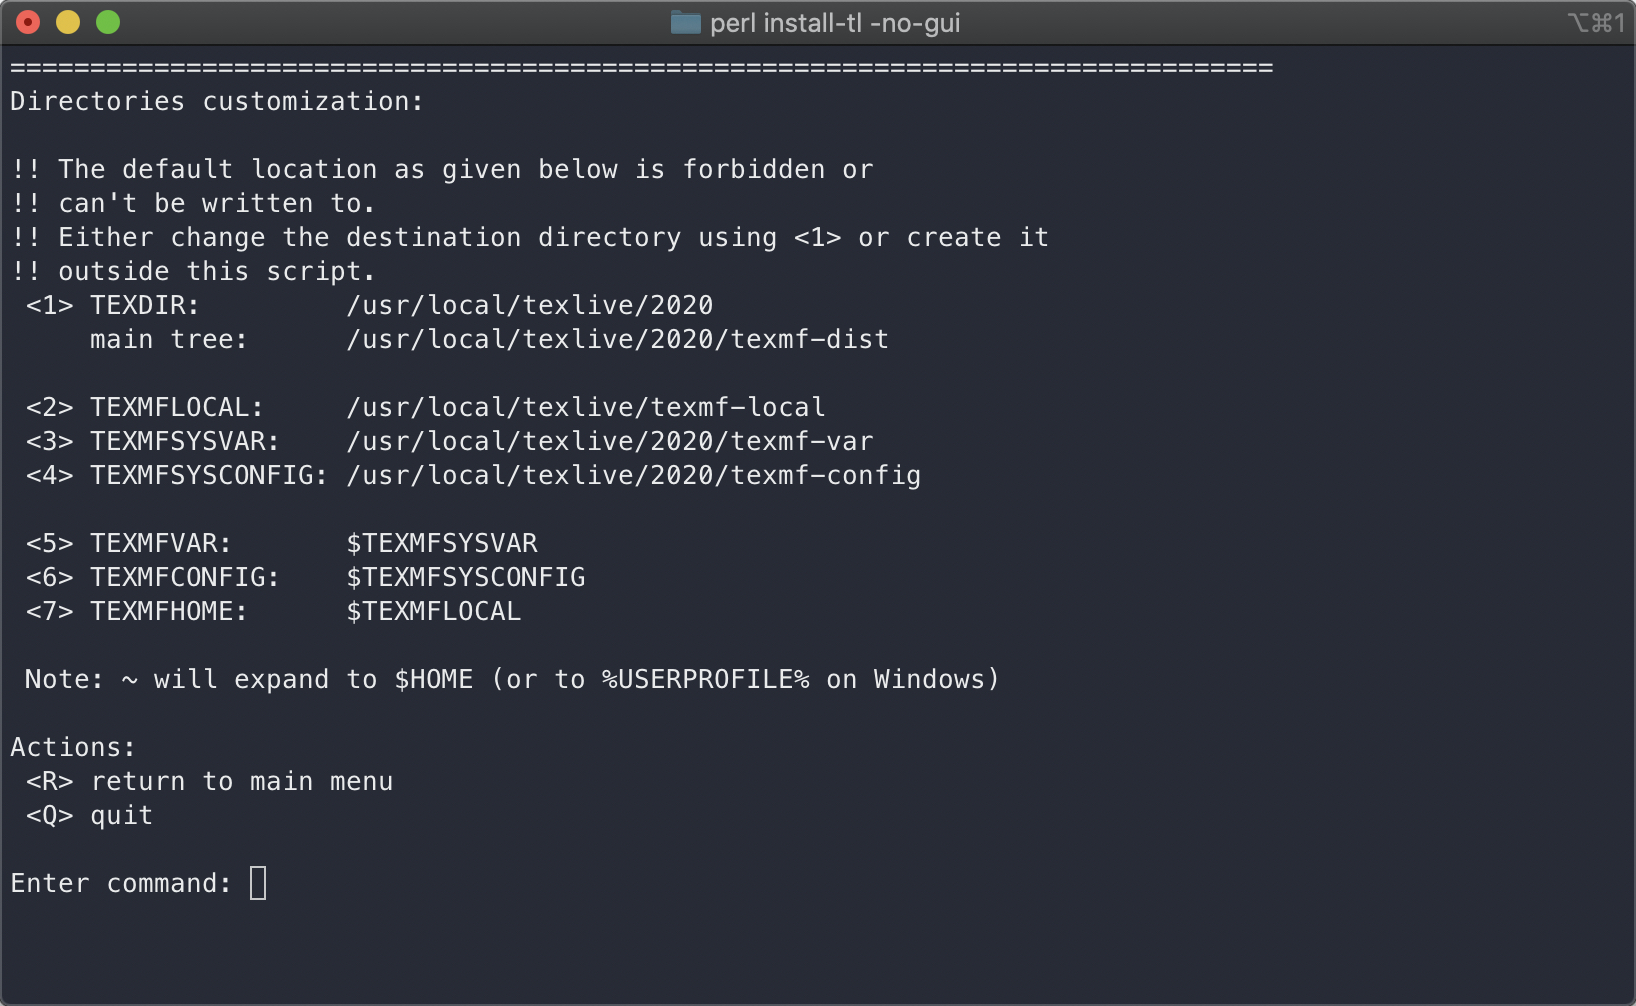
Enter the path to the directory that you created above followed by /texlive/2020.
For me this would be /Users/petersmith/bin/texlive/2020:
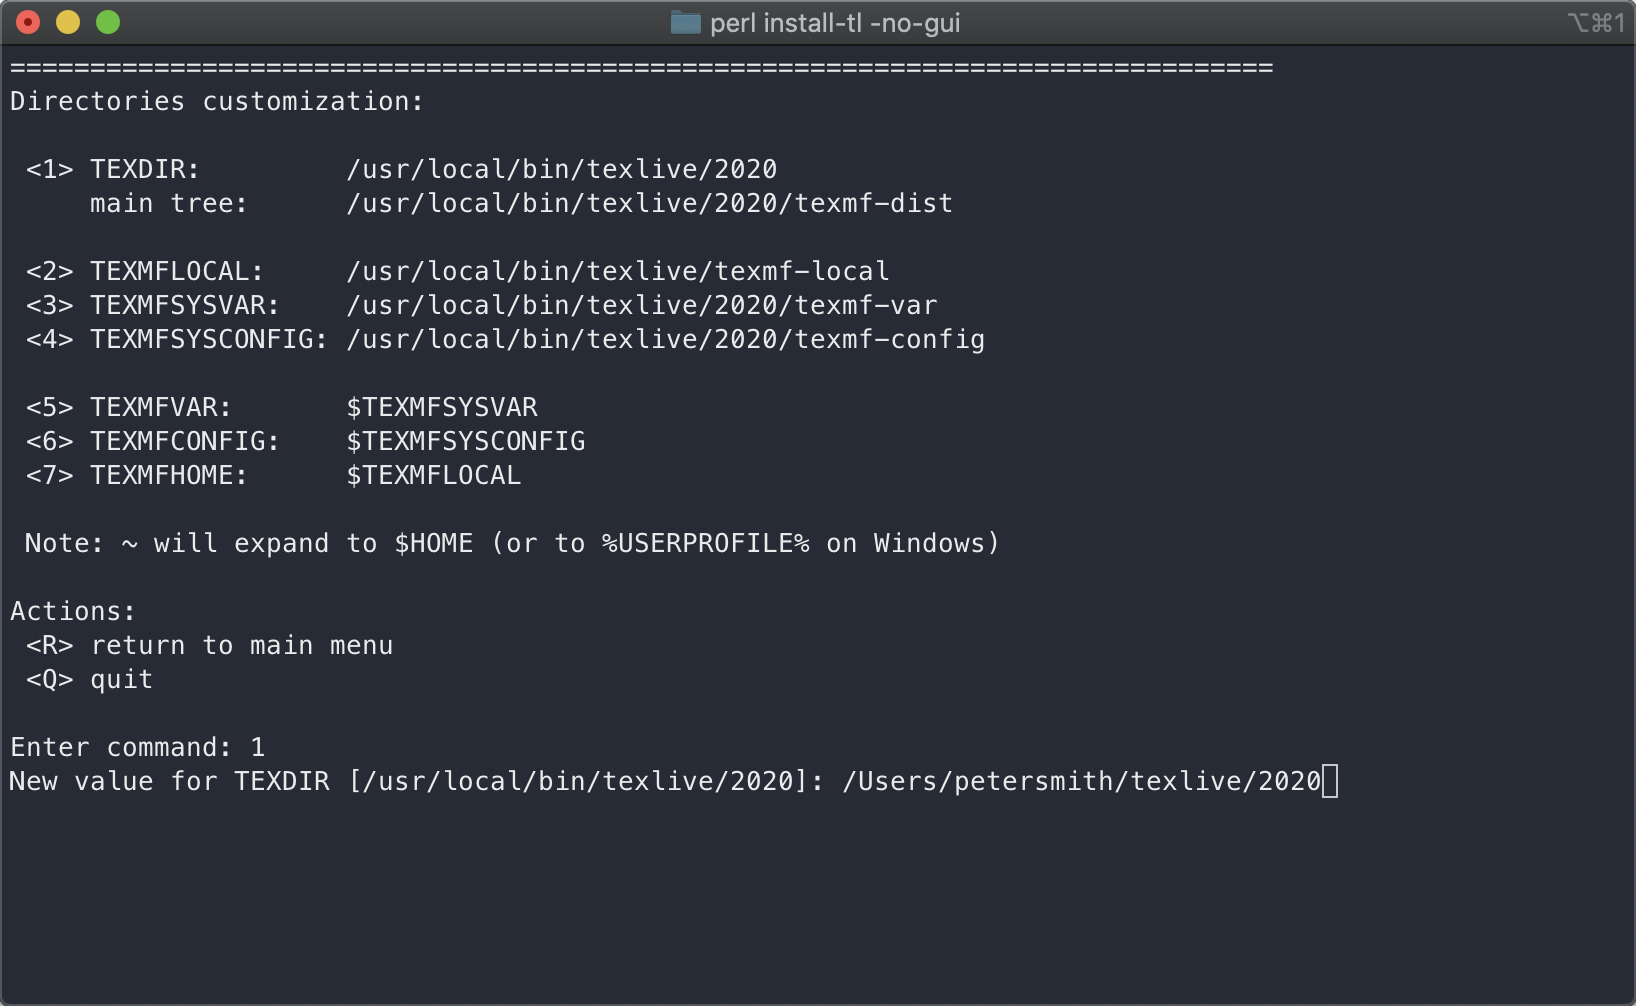
Click Enter and it will save the result. The other variables will be automatically updated to follow this path:
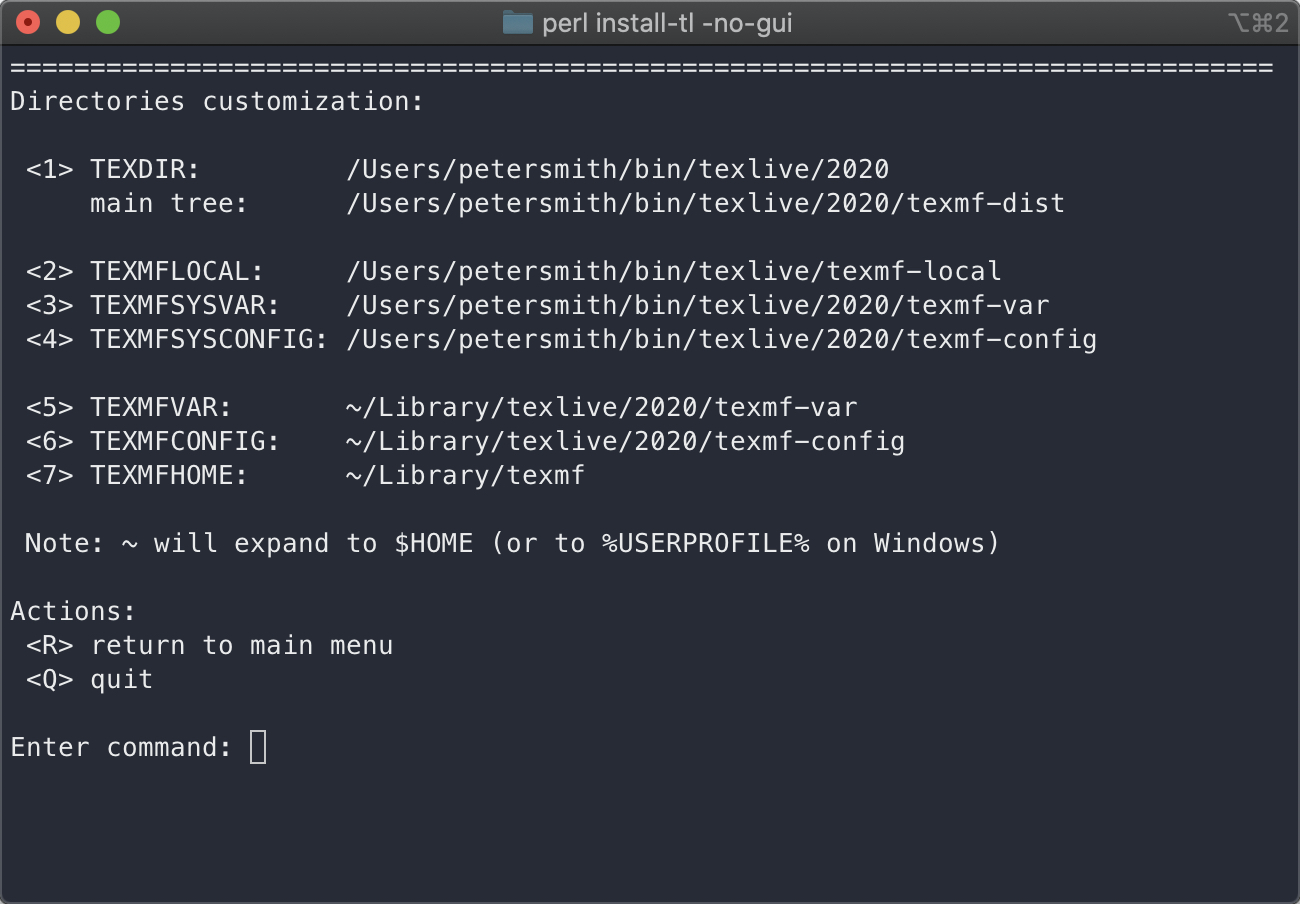
Now press R to return to the main menu.
Setting the collection list
Now we’re going to customise which package collections we wish to install. The default is a full installation with 40 out of 41 collections.2 Press C followed by Enter. The following dialogue will come up:
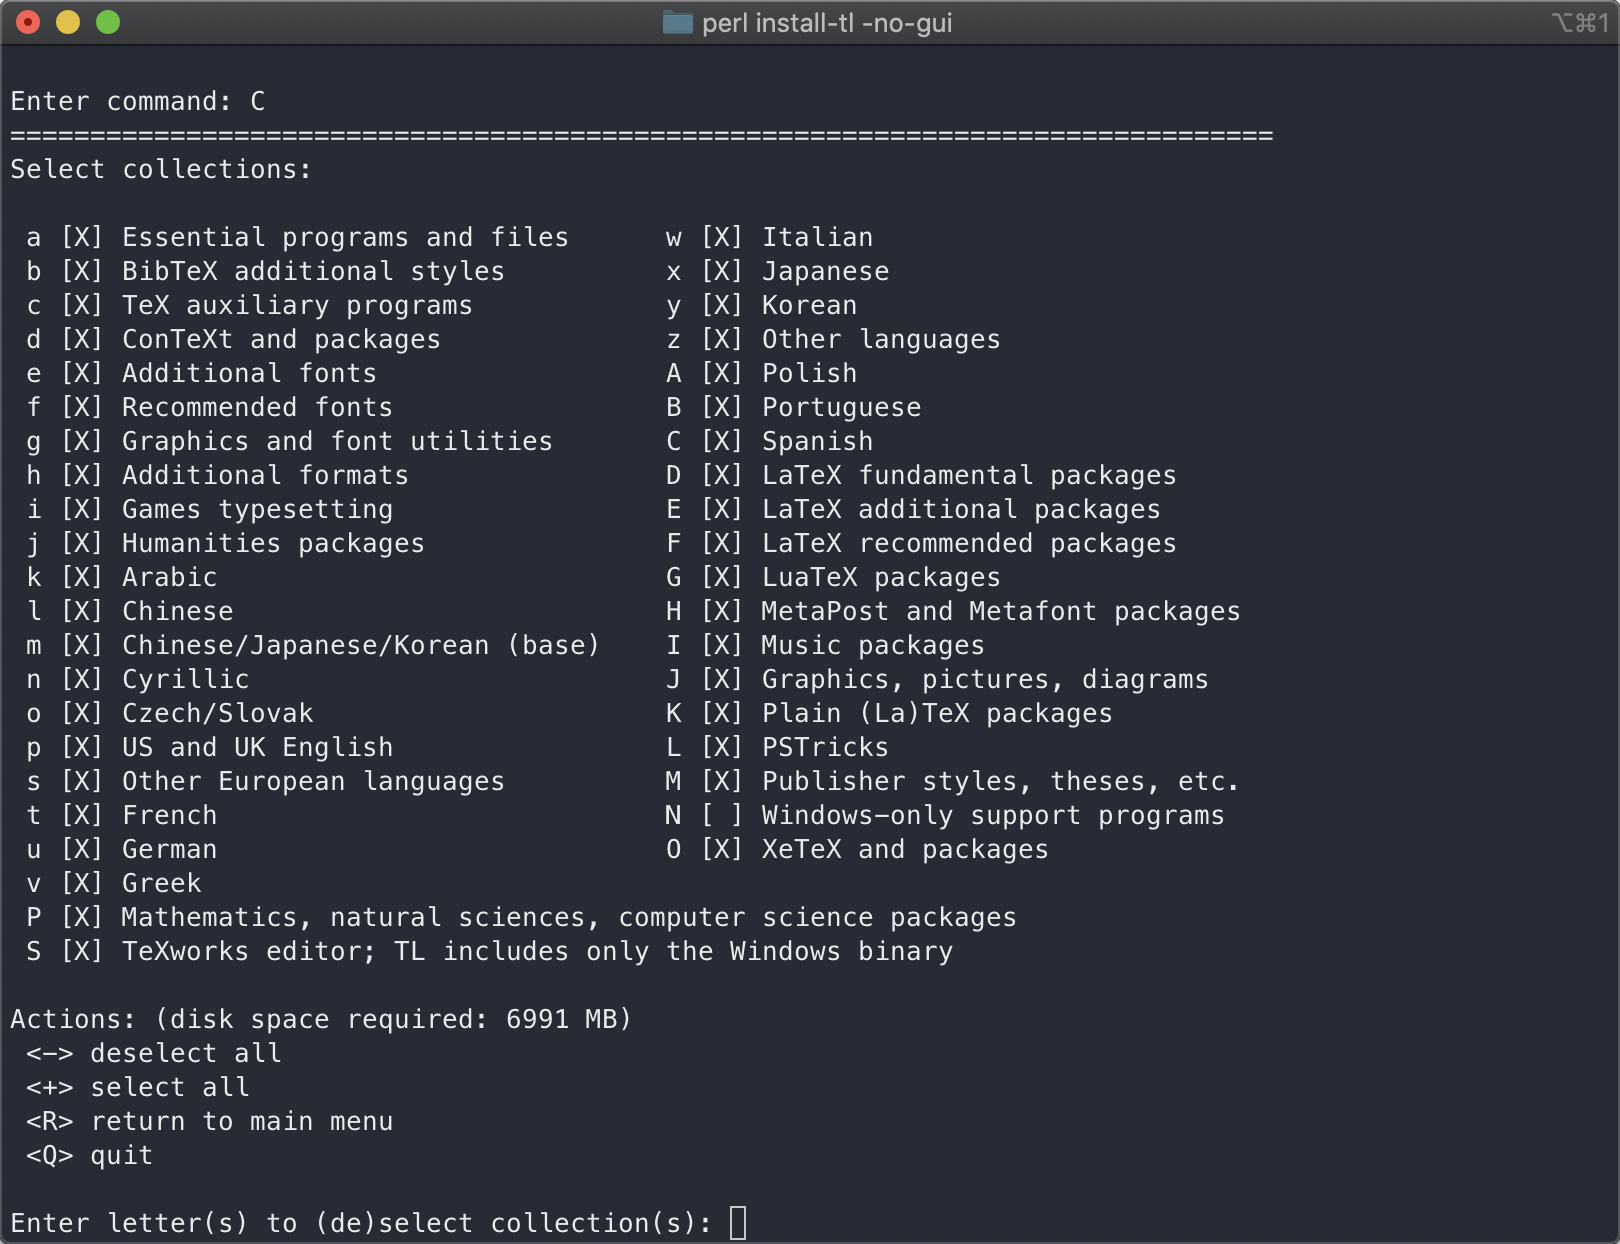
As noted by the X marks, all collections except for the Windows programs are to be installed.
To reset and deselect all, press -.
Then, choose whichever you want to install.
For instance, suppose that you work in the humanities and exlucsively write in English and German, then you would want the support for these languages alone.
Select these with the corresponding letters, in this case p and u, press Enter and they will be added to the installation:
Support for these languages is good but won’t get you far, so you’ll need more. Now you can customise to your needs. Let’s suppose you work with XeLaTeX and work in the humanities. Then you’ll need the following:
- Essential programs and files
- Humanities Packages
- LaTeX fundamental packages
- XeTeX and packages
To get these, press a, j, O and D. Press Enter to add them to the list to install. Note that the installation now is only 544mb, much, much smaller than the full collection.

Once you’ve selected what you want, press R to return to the main menu.
Most likely you don’t need to modify anything else, and so start the installation by pressing I and then Enter.
The installation will then begin and download the relevant packages and install them to the selected location.
Following this, you need to set the $PATH variable (see below).
Install with GUI
If you’d rather use a GUI for the installation, instead of running with the option -no-gui, use the following command:
perl install -gui
The following window will pop up:
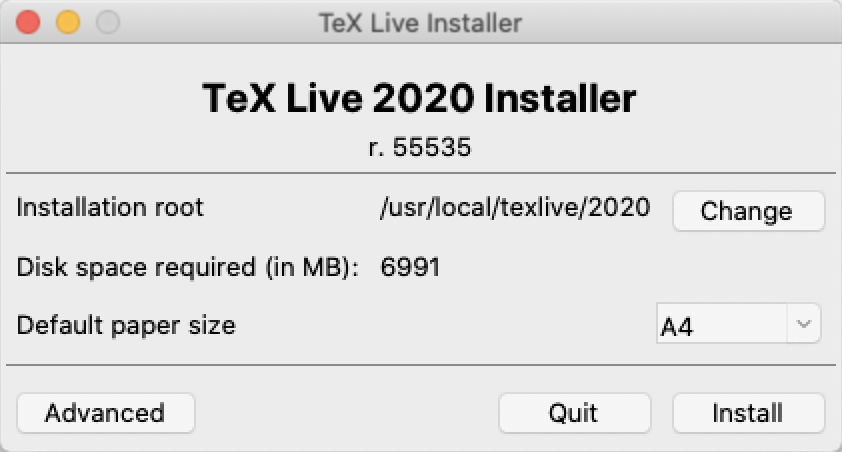
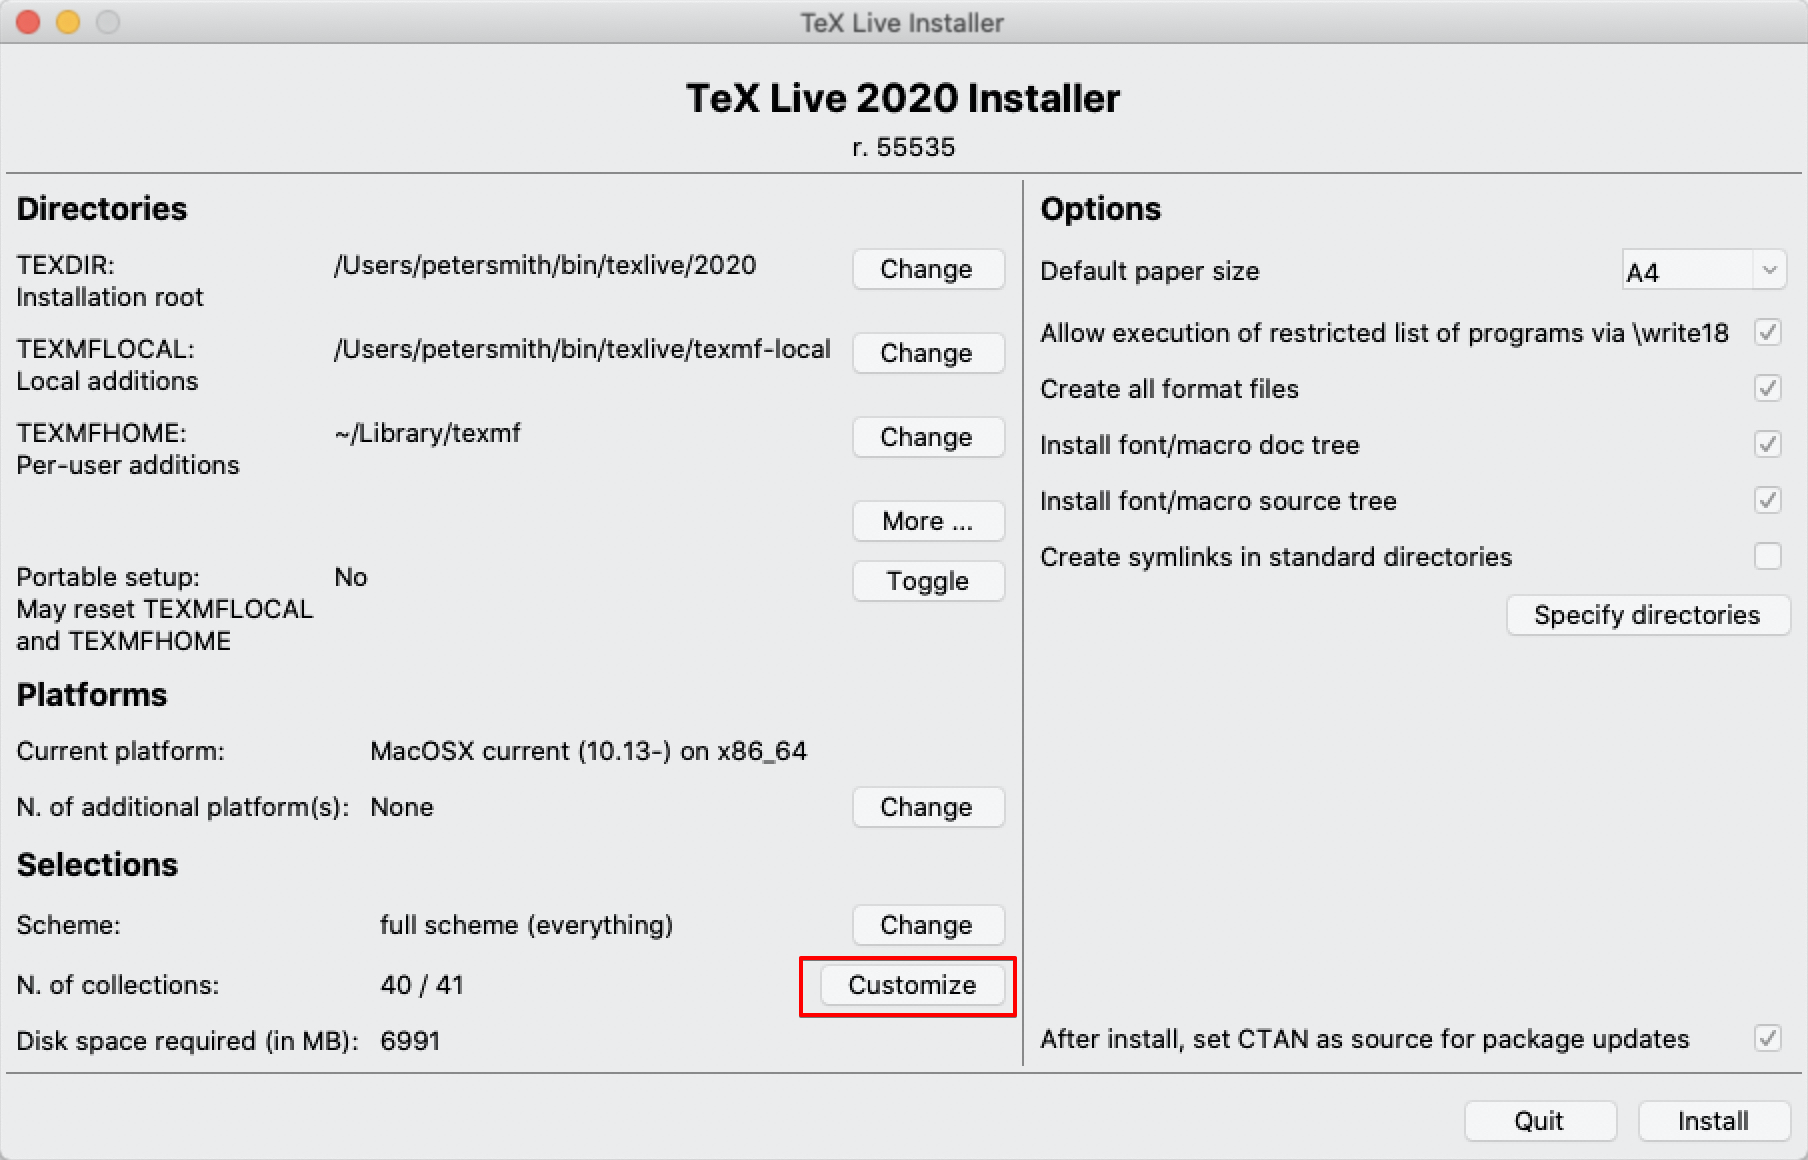
To customise the installation, click the Advanced button at the bottom left, which will bring up the following:
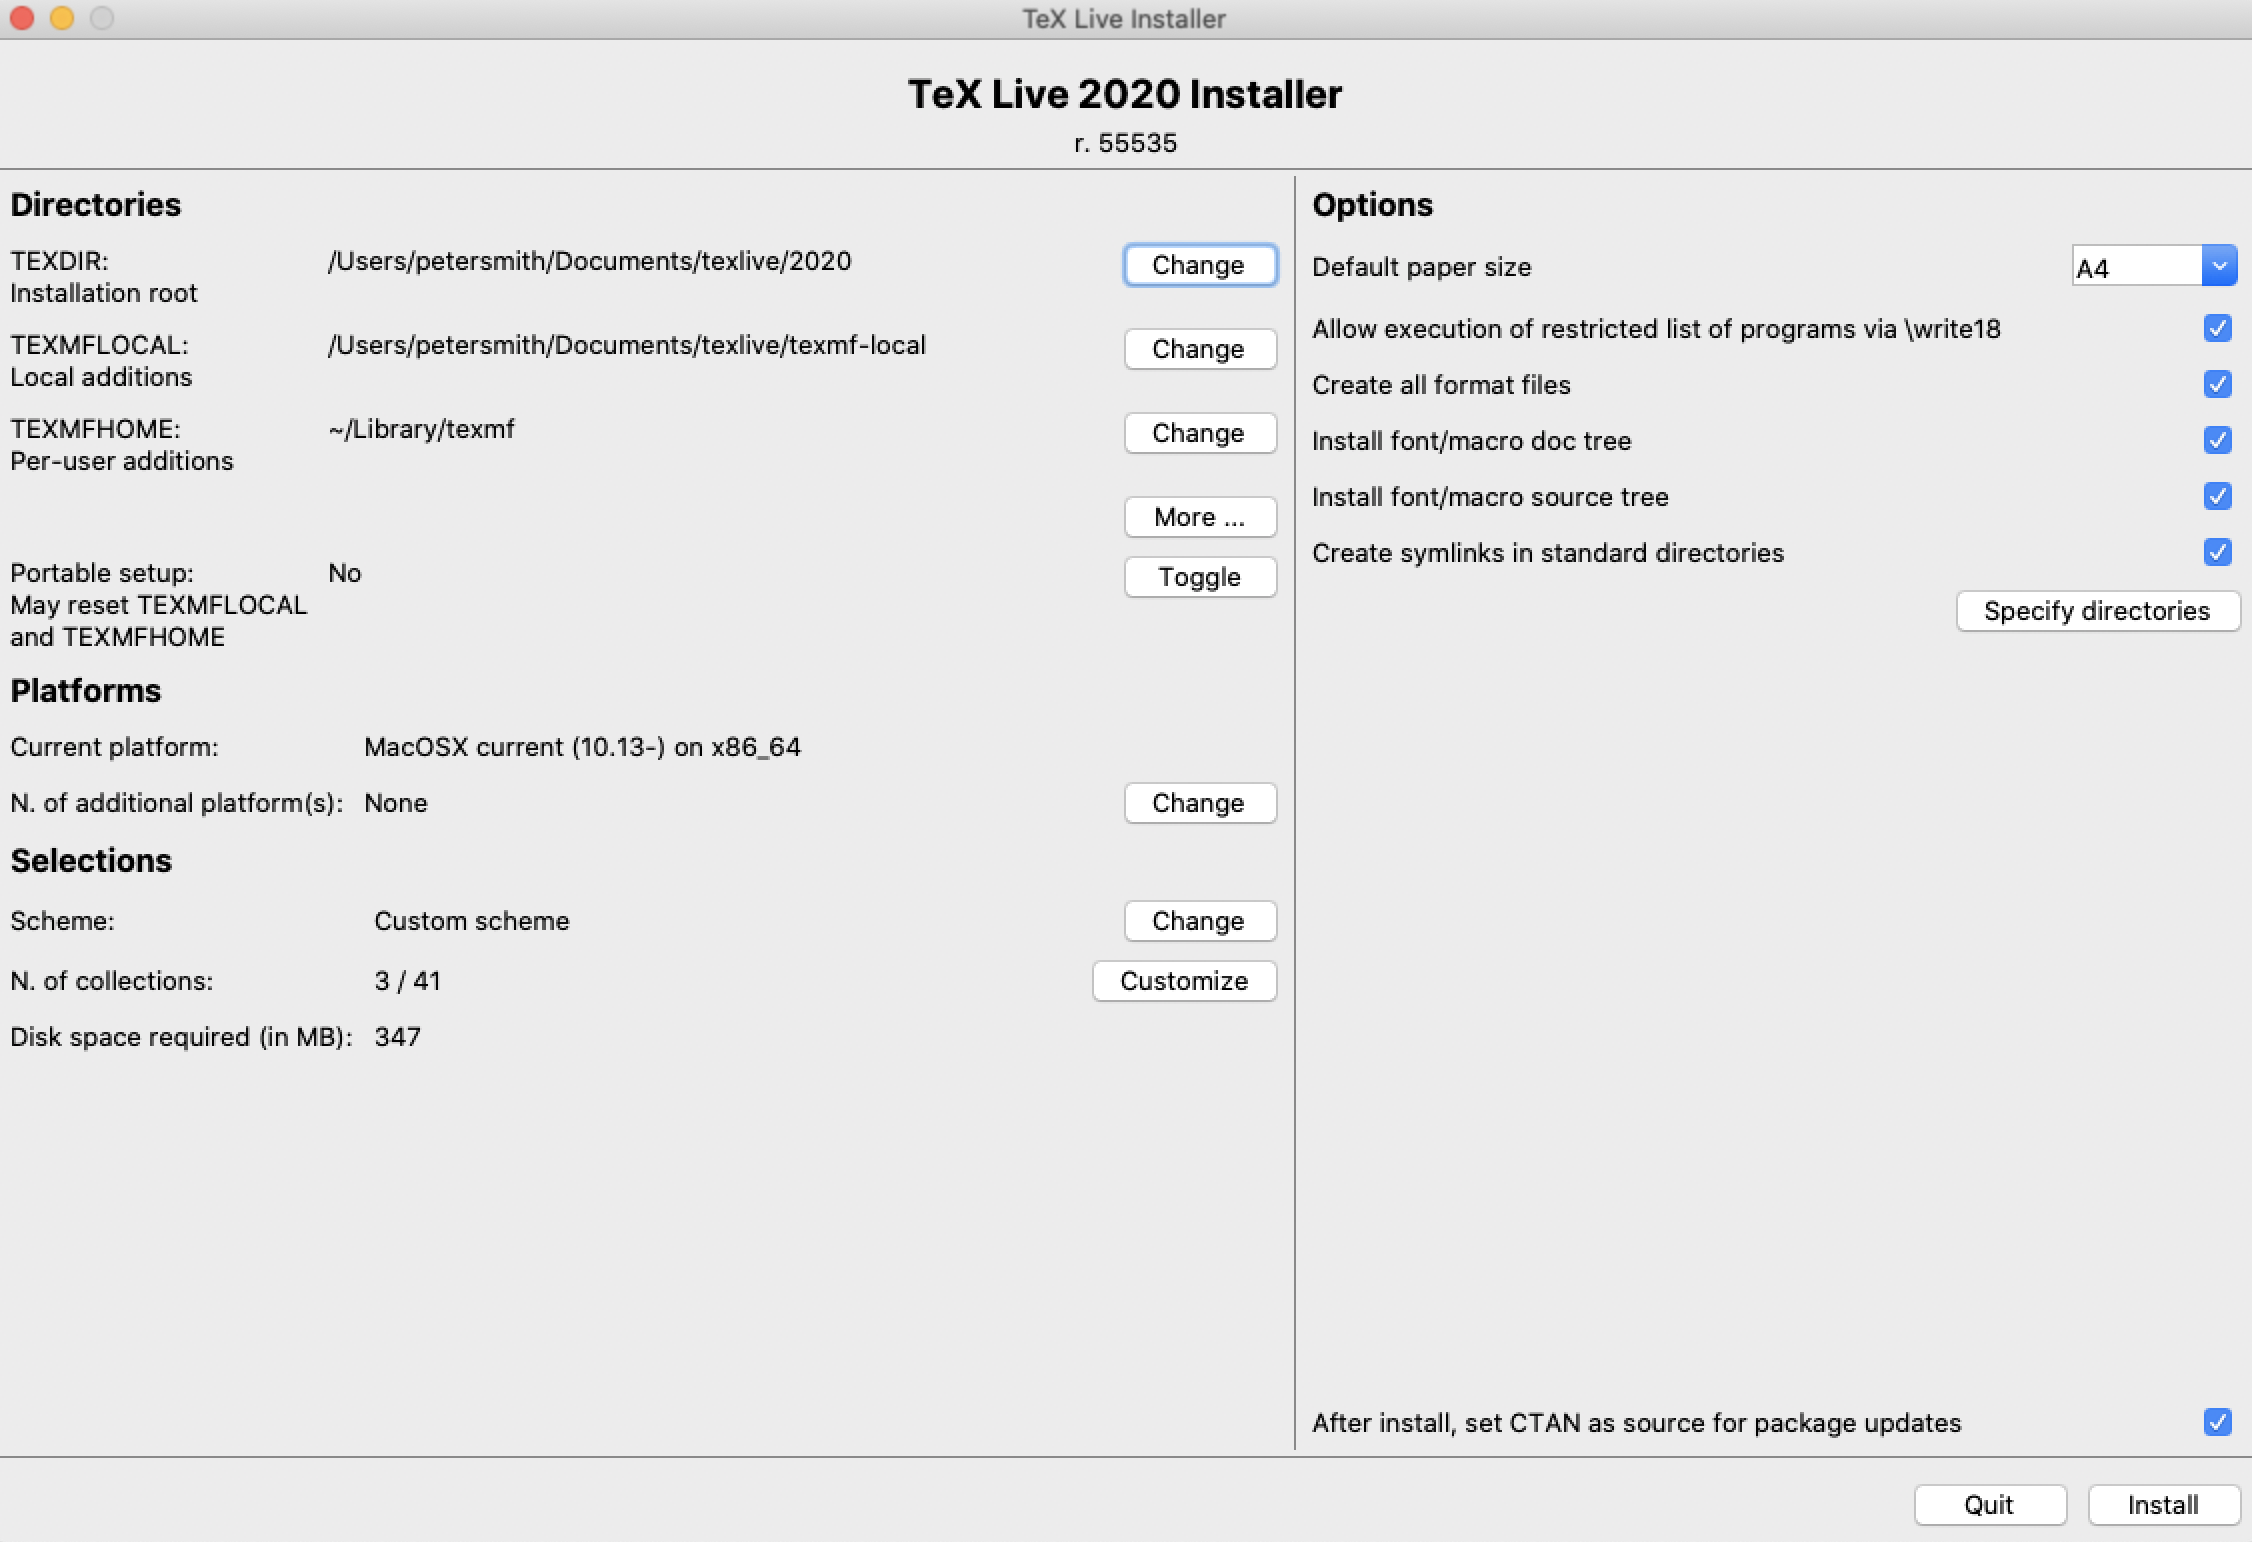 Some options
Change installation location
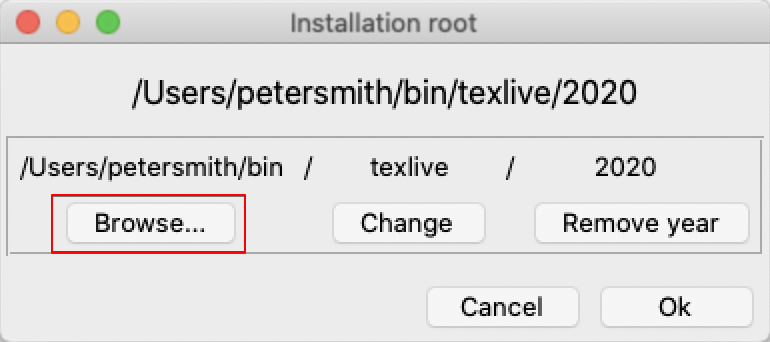
To change the installation location, click ‘Change’ for the ‘TEXDIR’ value:
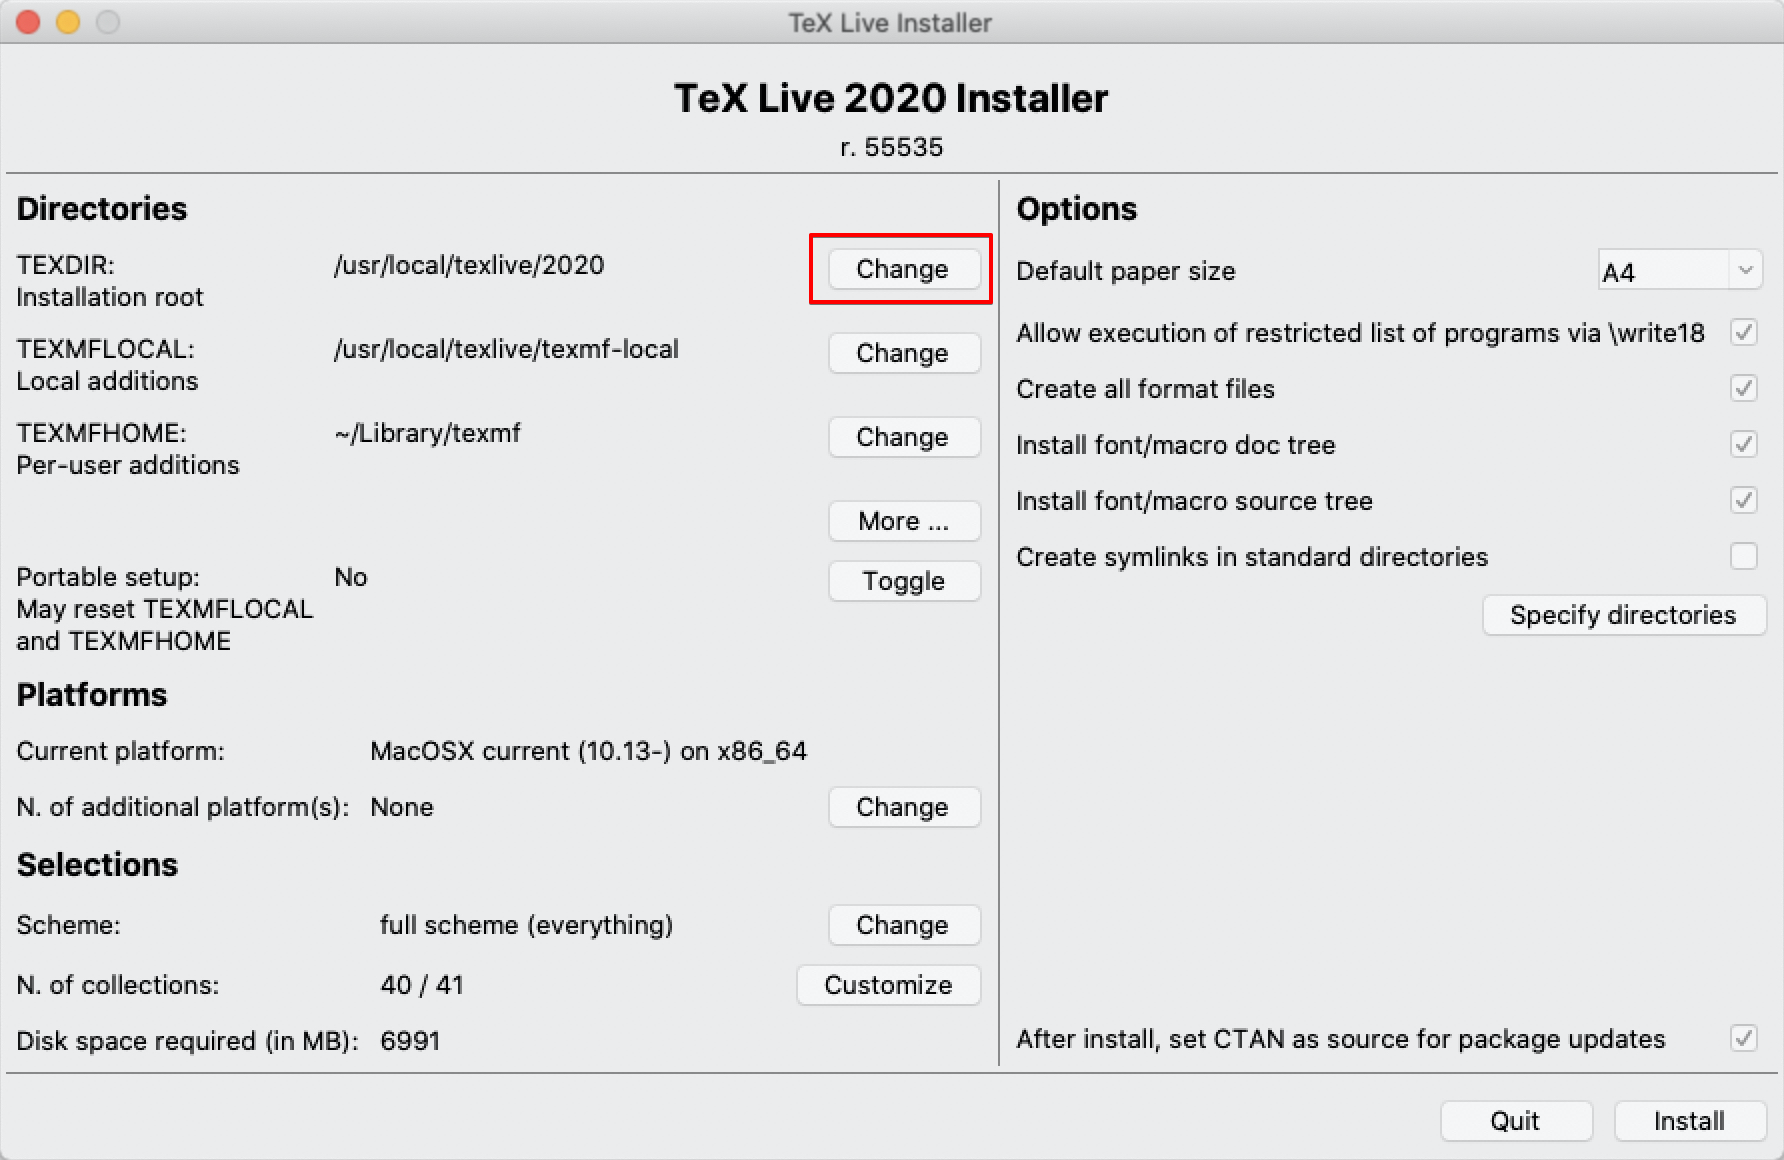
Then, click ‘Browse’ on the popup window and select the directory you made earlier.
Customising collections
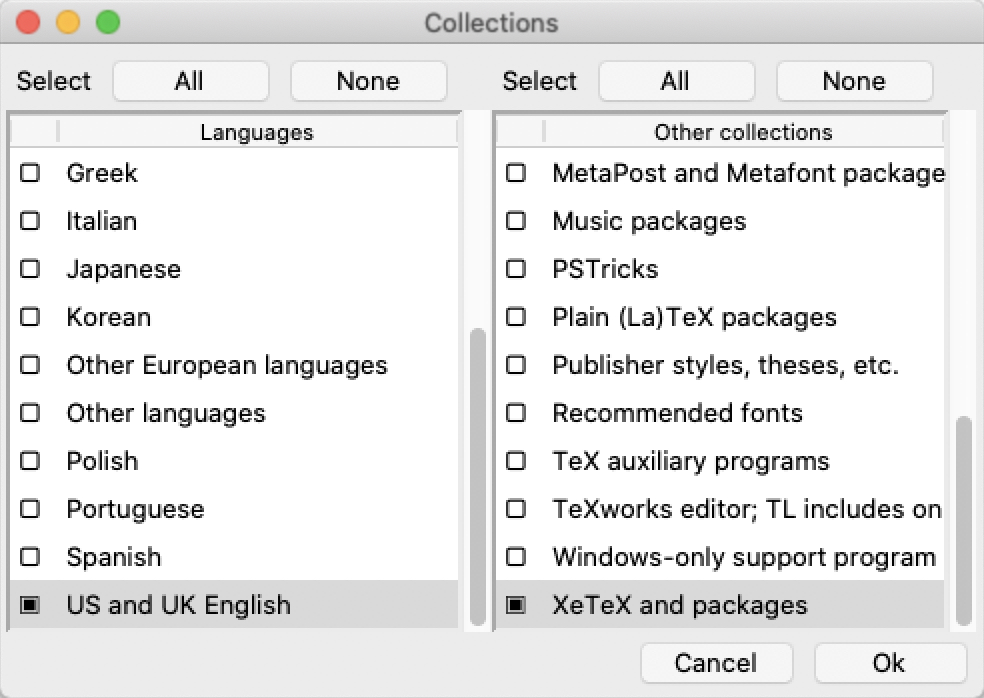
To customise the collections click ‘Customize’ next to ‘N. of Collections’.
At the following window, first reset the values by pressing ‘None’ over both columns, and then select what you desire from the two columns. Again, for this guide I’ll assume someone working in the humanities who write exclusively in either German or English, and uses XeLaTeX.
Once you have set these options, then click ‘Install’ and the Installer will begin the installation.
Post installation update $PATH
The final installation step is very important, you need to let your computer know where to look for LaTeX. You will be prompted to do this at the end of the installation:
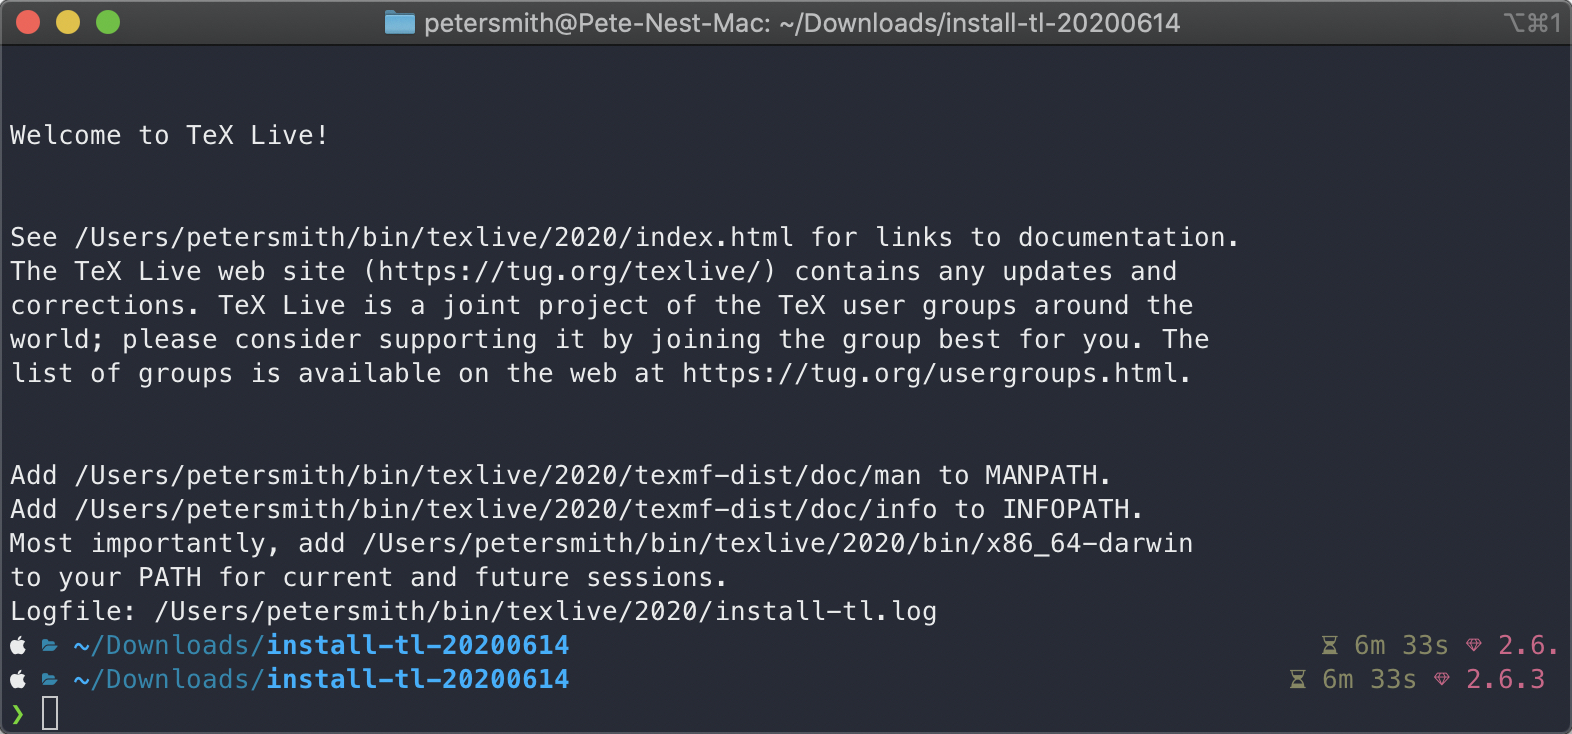 A similar message will pop up if you used the GUI method.
To do this, you need to add the relevant locations to your $PATH variable to the relevant shell configuration file. Most likely this will either be .bashrc or .zshrc depending on your system.3 Run the following command to find out which shell you are using:
echo $SHELL
If that returns /bin/zsh then you need to edit ~/.zshrc, if it returns /bin/bash then you need to edit .~/bashrc.
Open the relveant file with whichever editor you prefer, and add the following lines to the end, substituting the relvant location with yours:
export PATH="$PATH:/Users/$USER/bin/texlive/2020/bin/x86_64-darwin"
export MANPATH="$MANPATH:/Users/$USER/bin/texlive/2020/texmf-dist/doc/man"
export INFOPATH="$INFOPATH:/Users/$USER/bin/texlive/2020/texmf-dist/doc/info"
Then, either logout and then login again, or within the terminal window use the relevant command from below:
source ~/.zshrc
source ~/.bashrc
Test the installation by making the following document, and compile using XeLaTeX.
\documentclass{article}

\begin{document}

Hello World!

\end{document}
If a pdf is produced, then you’re good to go.
Using TLMGR to install missing packages
The above method will install LaTeX on your system much smaller than the full one. However, you will inevitably get to a situation where you use a package that has not been installed. The texlive installation provides tlmgr, a command line tool to help remedy this situation.
Suppose that you call a package in your preamble, and you don’t have it installed, the console will throw the following error.
Here the error is a missing fontspec package.
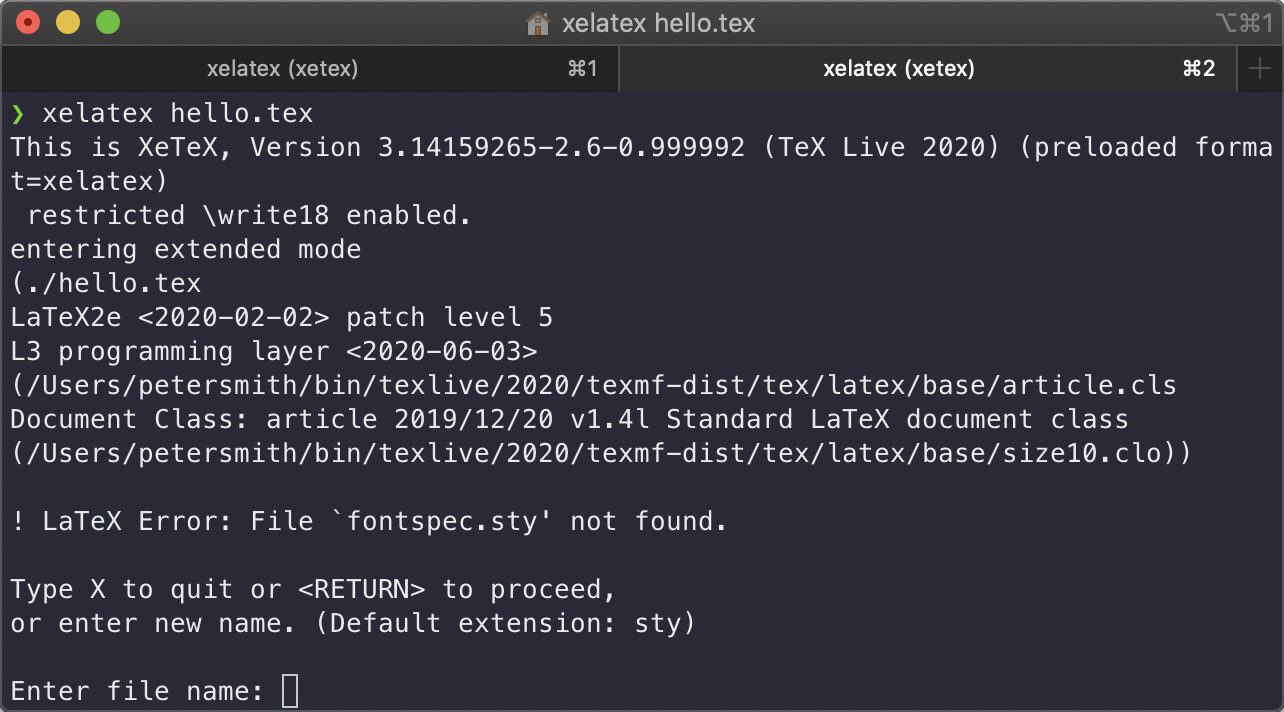
If this happens, open up a terminal window:
tlmgr install fontspec
The utility will then download the relevant package for you, including its dependencies. Tlmgr is a very powerful and useful tool, with good documentation, which can be found at:
man tlmgr
When to install as root
Throughout this guide I have shown how to install without root priveleges, as it is not necessary.
However, there are certain situations where you might want to.
The most obvious one, is if there are multiple users on a single system, and they all need access to the LaTeX installation.
In this case, then it makes sense to have TeX installed in the default location, where all will be able to use it.
If you wish to do this, then just prepend the perl commands above with sudo and give your password when prompted:
sudo perl install-tl
Depending on whether you use the -gui or -no-gui flag, the steps are then the same as described above, only leave the installation location as it is.
Thus, the installation path should be /usr/local/texlive/2020.
If you do this, then an extra step is needed before installing packages through ‘tlmgr’. At the first instance that a package needs to be installed, then each user should run the following command:
tlmgr init-usertree
This will set up a local directory for the user that they have permission to write to.
Packages can then be installed as necessary as outlined in the above section.
Note however, that the packages installed will only be accessible to that user, and only the packages installed at the base installation or those installed with sudo tlmgr install <package name> will be available to all.
Conclusion
It is easier, for sure, to jut download the full Mactex installation, as you don’t need to worry about anything, or installing packages later. Everything you need is there, along with a whole lot you likely won’t need. Installing LaTeX in the way described here can save you a lot of space on your system, and allows you to only install what you need and want. Ultimately, whether you want to follow this method or just install the full one is personal preference.