
This post is the first in a series that will outline how to use reveal.js to make slide shows for lingusitics talks. A lot of information is relevant for other academic disciplines as well. I do apologise to linguists who are not syntacticians or morphologists for not addressing area-specific requirements (OT-tableaux, for instance).
What is reveal.js
There are many options to create slide decks, each with their own benefits and drawbacks. By far the most popular, and the ones overwhelmingly seen during talks, are dedicated slideshow software such as Microsoft Powerpoint or Keynote from Apple, or slides created through LaTeX using Beamer. Other options such as Prezi will also output slides.
Reveal.js is a javascript library that creates a slide deck by writing in html. That means that the source code is plain text, and all it needs is a browser to run. Therefore, they are independent from a particular operating system (unlike powerpoint and keynote).1
So, it’s like beamer?
At a certain level, the two are similar: they have in common that the source files are both written in plain text, are not OS-specific, and do not require specific software to run (that is, both LaTeX and Javascript have wider, more general uses than just making slides). A difference between them beamer presentation will be run through LaTeX to create a pdf file, whereas a reveal.js presentation is rendered as a webpage. The key difference between them is that beamer files are static, as pdf files, whereas reveal.js slides can be interactive, as they are effectively a web page. Any interactive web content can therefore be used. The benefit here is that media can be directly played (videos, sound clips) and that diagrammes can be created that are interactive. Furthermore, animations on slide transitions can be used, as well as a host of other things, see the live demo for example, as well as other example presentations.
To give an example: suppose that you have done work with a typological component to it and you would want to put a map into your presentation showing the number and distribution of languages that you did. It is no problem to do this with beamer: you make an image like the following and put it in the slides as an image:
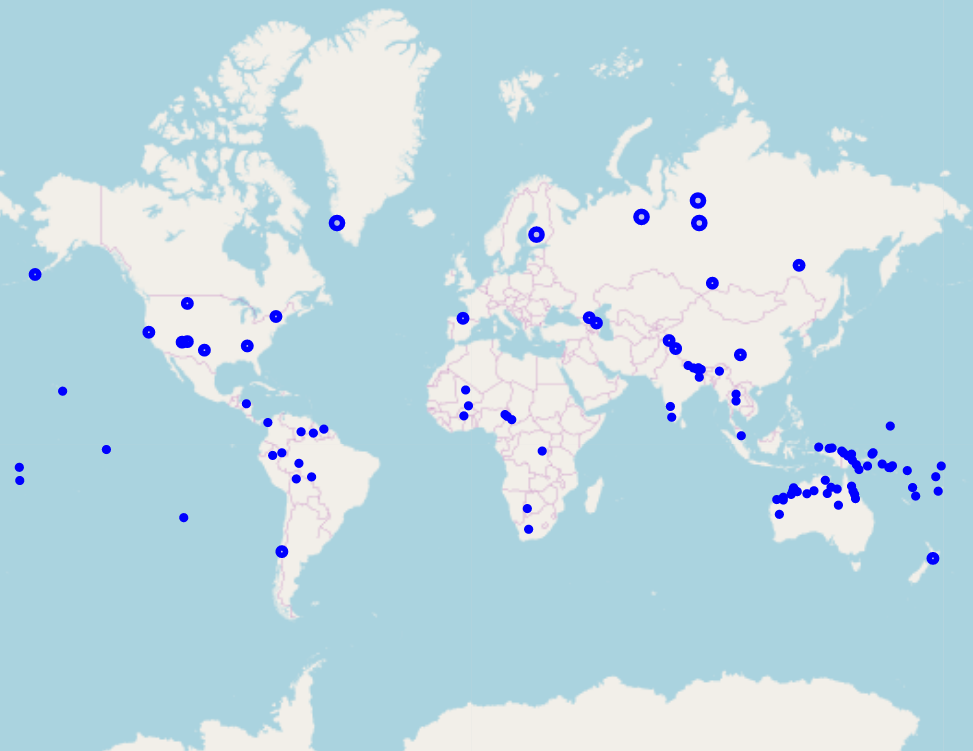 A static map: Useful for showing raw numbers as distribution, but impossible to get much further data from.
The problem with this is that it is fixed: you can’t zoom in on the scale, hover over any dots find out which language is represented by which dot etc. With reveal.js, it is possible to make maps like the excellent ones they have at WALS and use them in your presentation, using relatively simply javascript such as Leaflet, which is easy to use. I did this recently and the result is good. It took a short while to figure out the code for the maps, but it’s easy to do once you get it going, and, whilst I know some, I don’t have a very high level of javascript knowledge. In addition to showing the audience the raw number of languages, people can interact with the map and find out which langauges etc. It’s not something you’ll do in a talk itself that much, but for people following along on their own computer either live, or after the fact, then it’s useful.2
Another difference between the two is the flexibility with regards to appearance. Whilst beamer presentations can be styled according to pre-built (such as Warsaw, Malmoe or Frankfurt, or the very nice metropolis theme) or custom templates, reveal.js can be styled using javascript and css. This gives more flexibility, since all that is required is relatively rudimentary css skills, and properties can be assigned ‘on the fly’ according to the needs of the user. This is not to say that you can’t do similar styling with beamer, it is just easier and quicker in my experience to do it with css.
Drawbacks vs. beamer
Mostly, the process of making reveal.js slides works in much the same way as with beamer, with the only major difference being the markup language.
\begin{frame}
\begin{itemize}
\item Here is a bullet point.
\item \textit{With another written in italics}.
\item \textsc{And another in small caps}.
\end{itemize}
\end{frame}
Is broadly equivalent to (with italics and small caps defined in a css file):
<section>
<ul>
<li>Here is a bullet point</li>
<li><span class="italics">With another written in italics</span>.</li>
<li><span class="smallcaps">And another in small caps</span>.</li>
</ul>
</section>
In practice however, the markup language differences will have little to no effect on the writing process — aside from a couple of specific instances, discussed below — as a good text editor with snippet support will result in the same number of keystrokes being used to add in all of the surrounding markup, so the writer can focus on the content.
The areas where there are noticeable differences for specifically linguists come in three areas: citations, examples and tree drawing.
All of which are easily integrated into the LaTeX workflow through different packages , notably biblatex/natbib in the former case, gb4e/linguex for examples, and (some variant of) qtree/forest in the latter.
The big advantage of using these is that they directly integrate with latex and fit seamlessly into the text: these are compiled at the same time as the text, with the result that the native formatting of the paper and slides is used.
Furthermore, in the case of citations they can be formatted according to the usual standards of the field.
Those accustomed to writing papers and slides in LaTeX will find initially that these aspects of reveal.js are less intuitive for their workflow. That said, there are ways around them, which are equally, or near equally good, though, it is not as seamless a process as with writing sides with beamer.
Citations
The first instance is with citations. Ususally, at the end of a paper, one will find a list of citations like below:
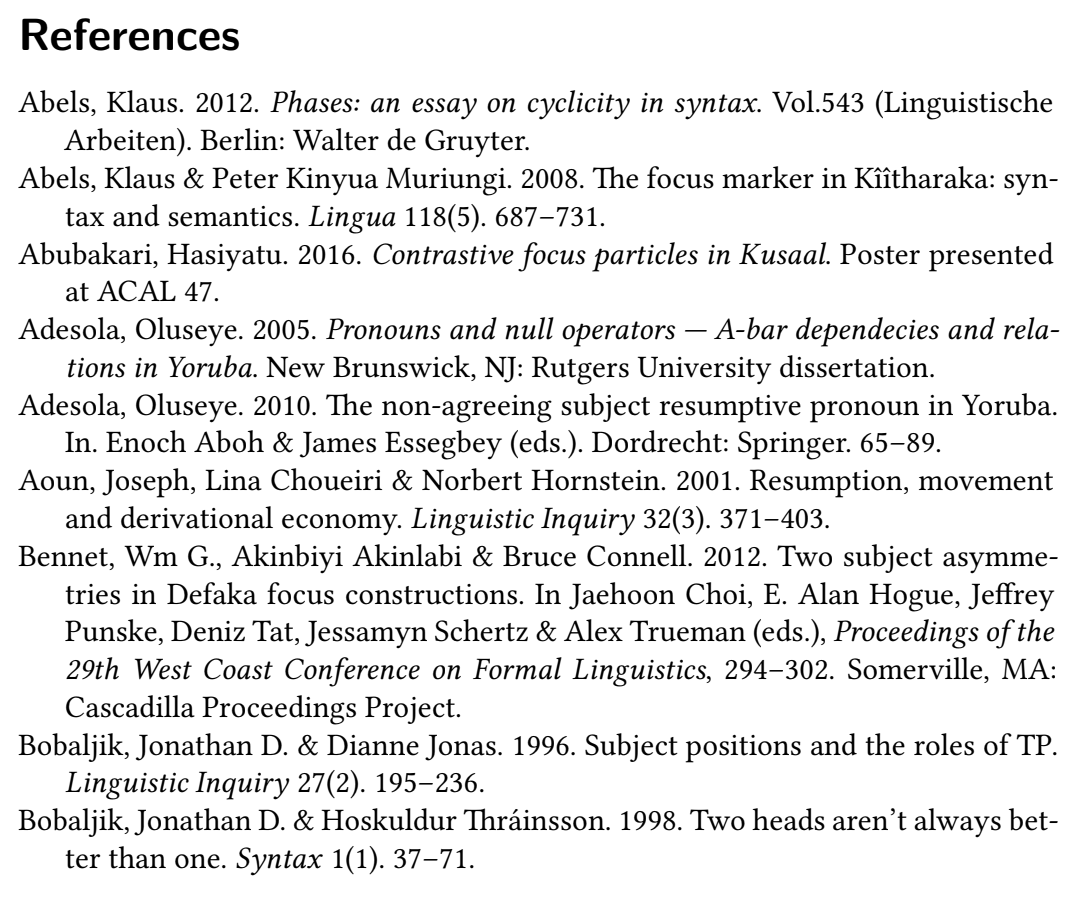 Usual method of citations.
Usually, academics carry this over to slides as well, particularly if writing in beamer, given that the commands are the same.
Unless one uses pandoc to generate reveal.js slides — I’ll shortly write a how-to, including advantages and disadvantages of this — there is no direct way to generate a citation list as given in the example above.
Html and css do not support bibliography management as far as I know, and whilst one can export a citation list using Zotero or Refworks into html and incorporate that into your slides, this is still indirect, and is vulnerable to forgetting to include citations.
One of the great things about LaTeX is that you need only include \citet{reference}, run biber/bibtex and it will appear there.
Since reveal.js does not offer this system then one has to change things a little. The obvious change, and the one that I use is to simply adapt to the system one is using and link your citations as hyperlinks in the slides. For instance:
<section>
<ul>
<li><a class='citation' href="moskalglossa">Moskal (2018)</a> has argued that suppletion is never seen for the inclusive alone.</li>
</ul>
</section>
The above will render as the following (with styling of the citation link done in css). The benefit of doing it like this is that one allows the audience to see the citation, and if they are following the slides along on their own device (it’s very easy to host slides online before your talk, for instance on github, or a personal website), they can click the links to arrive at the paper. The downside is that the audience cannot check a reference list in realtime to see what ‘Moskal (2018)’ (in the above example) refers to,by leafing to the end of the handout. However, I think that this is a relatively minor drawback, especially if one is already hosting the slides online: the citation is there. Furthermore, there is a major benefit in that you are taking the reader directly to the citation, rather than just telling them where to find it.
That said, the attachment of academics to a reference list at the end is fair, and it is useful. With reveal.js you can make reference lists to use. What is needed is to use an external way of making the list, and copy-pasting the list into the slides at the end. As noted above, Zotero and Refworks offer such a possibility, and it’ also possible to do it using Pandoc and Ptyhon (which I will outline soon.)
Trees
Overall, a major benefit of using LaTeX is that there is a large amount of packages ready for use that have been developed over the years.
Given that reveal.js is a relatively new framework for making slides, and that it is not often used by adcademics, such packages are missing.
This is starkly the case with tree drawing, something that is really easily handled by qtree/forest using LaTeX.
\begin{tikzpicture}[baseline]
\Tree [ [ A woman ] [ saw [ a dog ] ]
\end{tikzpicture}
Again, html and css don’t offer any native functionality to draw trees in this way. It is possible to do so using some javascript libraries: Mermaid, though intended as a library for making flow charts, can mimick syntactic trees (see here for a presentation I made using this method), however, it is far from ideal to do so. A better option is to simply draw the trees in graphic making software and export it as a png for inclusion in the talk.3 There are some good options in this case, and I prefer to use Inkscape, which makes the job very easy to do once you know the program.
Laying out examples
Linguistics has a specific set of typographical requirements, chief among them the need to put examples in numbered lists.
Using LaTeX makes this easy to do, by using either the gb4e or the linguex package.
What is nice about these packages is that they will not only do the numbering automatically, but they also line up the examples together so that they all start at the same level of indentation.
It is possible to recreate this behaviour for reveal.js presentations by making the layout in css.
I have made a css template, htmlex, that should serve as the basis.
In brief, the idea is to use css counters to create the numbering, flexboxes to line the elements up in right place, and to use this answer for getting the words and the glosses lined up right.
The result, as you can see below is a pretty good recreation of what gb4e/linguex would make for you.
#
-
- Ik
- I.nom
-
- zag
- see.past
-
- twee
- two
-
- ber-en,
- bear-pl
-
- brood-je-s
- bread-dim-pl
-
- smer-en
- spread-inf
'I saw two bears, spreading on sandwiches.'
-
- Oh
- Oh
-
- dat
- that
-
- was
- be.3.sg.past
-
- een
- a
-
- wonder!
- miracle
'Oh that was a miracle!'
Of course, it is a little different from making the equivalent in LaTeX — given the markup differences this is inevitable — however, there are some nice aspects to it. Below is the LaTeX markup:
\begin{exe}
    \ex[\#] {
        \gll Ik zag twee ber-en, brood-je-s smer-en\\
    I.\textsc{nom} see.\textsc{past} two bear-\textsc{pl} bread-\textsc{dim}-\textsc{pl} spread-\textsc{inf}\\
    \glt `I saw two bears, spreading on sandwiches.'}
\end{exe}
and here is the html equivalent using htmlex:
<div class="gloss-example-container">
    <div class='gloss-individual-example'>
        <div class='example-number'><p class='ex'></p></div>
        <div class="ab-counter"><p class='ab'></p></div>
        <div class='judgement'><p>#</p></div>
        <div class='gloss-example'>
            <ol class='sentence'>
                <li class="gloss-individual-word">
                    <ol class='word'>
                        <li class="target-word">Ik</li>
                        <li class="target-gloss">I.<span class='smallcaps'>nom</span></li>
                    </ol>
                </li>
                <li class="gloss-individual-word">
                    <ol class='word'>
                        <li class="target-word">zag</li>
                        <li class="target-gloss">see.<span class='smallcaps'>past</span></li>
                    </ol>
                </li>
                <li class="gloss-individual-word">
                    <ol class='word'>
                        <li class="target-word">twee</li>
                        <li class="target-gloss">two</li>
                    </ol>
                </li>
                <li class="gloss-individual-word">
                    <ol class='word'>
                        <li class="target-word">ber-en,</li>
                        <li class="target-gloss">bear-<span class='smallcaps'>pl</span></li>
                    </ol>
                </li>
                <li class="gloss-individual-word">
                    <ol class='word'>
                        <li class="target-word">brood-je-s</li>
                        <li class="target-gloss">bread-<span class='smallcaps'>dim-pl</span></li>
                    </ol>
                </li>
                <li class="gloss-individual-word">
                    <ol class='word'>
                        <li class="target-word">smer-en</li>
                        <li class="target-gloss">spread-<span class='smallcaps'>inf</span></li>
                    </ol>
                </li>
            </ol>
            <p class='translation'>'I saw two bears, spreading on sandwiches.'</p>
        </div>
    </div>
</div>
The html version is more code, certainly. However, if your text editor is configured well then you can automatically add in the tags with snippets, and so it works out roughly the same amount of work.
What is nice about doing it this way, however, is that the target words and the glosses are kept together, which does make it easy to find out what a word means in the source code.
You can see a live example of a reveal.js presentation that put examples in in this way.
Final thoughts
In sum, reveal.js offers a nice alternative to making slide decks. At its most basic, it lacks some functionality of beamer that many who use beamer will have come to rely upon, but the changes to workflow needed to overcome this are not that big. Using Inkscape to draw trees, for instance, is not such a big deal. Thus, it’s well worth trying out.
It does take a little bit of time to get usedto coming from a previous way of making slides, whether that is from beamer or from powerpoint/keynote, however, it is a nice alternative and the slides are nice and crucially non-static. I don’t think that it would take too long to get used to using reveal.js: it didn’t take me particularly long and my knowledge of css and html is not especially advanced. Some may be put off fromusing it because of the need to use a different markup language, which will inevitably take a little time to get used to. However, in my experience the adjustment isn’t that much work and worth putting the time in. The user guide is very detailed and well set out, so information is easy at hand for those who need a reference guide.
A summary of the key points:
- html based slide decks
- only needs a text editor to write and a web browser to display
- citations can link to the papers directly
- trees should be made in a graphics editing program like Inkscape and then imported in with a png.
- Examples are laid out using css flexbox.
-
Yes, I know that you can run powerpoint on Apple, but it never works quite as well as you’d hope. ↩
-
You can host the slides on github or gitlab and share the address with the audience. ↩
-
Exporting to png is not the only option, one can also include the images as svg files, in which case it is possible, though not trivial, to animate the trees as one can do so with any svg element on a webpage. This is useful if you have used beamer overlays to make trees grow or to dynamically add items to them. But, this is a topic for a different day. ↩